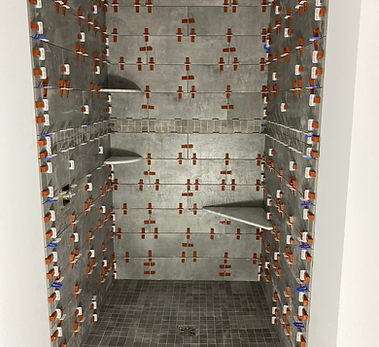
Shower Installation Process
Rocket Tile LLC builds our shower assemblies following the National Tile Contractor Guidelines (NTCA). Our shower systems utilize double waterproofing and can include curb or curbless options. This process included traditional craftmanship and utilized the newest materials designed for the installation of tile in wet areas.
Initial Preparation

Initial preparation of the work area involves confirming all subsurface are plumb level and square. To achieve a professional finish we confirm all steps in the process are done to perfection.
Initial Layout and Tile Installation

We take the time to properly layout the area so that your shower size and tile size match perfectly. We match all corners so the installation looks seamless across all surfaces.
Grout and Finishing

We finish our installation using epoxy gout and 100% silicone matched caulking. This gives our showers additional resistance to leaks and water seepage. This process adds to the additional layers of waterproofing that give our shower systems an NTCA leak-proof rating.
Backerboard and Floor preperation

We use GoBoard as a wall substrate. GoBoard is lightweight and fully waterproof. Before the floor is hand floated we install a Latricrete Water Proofing membrane. This creates a waterproof barrier between the shower floor and your home's subfloor. All joints are sealed with a Laticrete waterproofing sheet membrane and coated with a Laticrete Hydro ban liquid membrane. The waterproofing barrier is connected to the FlowFX drain system.
Finished Tiling

Using anti-lippage systems we can achieve a perfectly in-plane, plumb, and square install.


